
Importing data into Power BI is very straightforward. In this, article I will show you how to import data into Power BI.
Let’s get started.
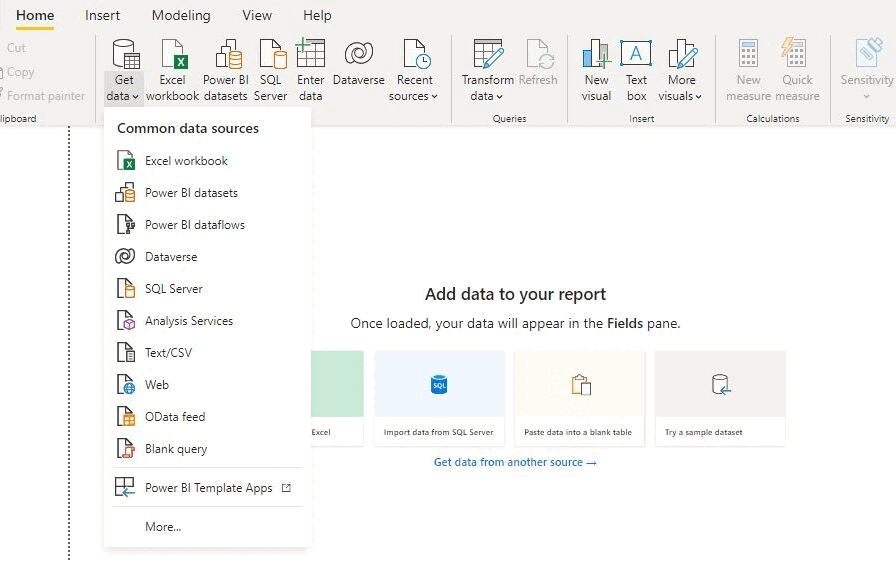
To import data, be sure you are on the Home tab.

On Get Data, click on the dropdown, and you will get to see the most common data sources you can connect to. As done below, you can click More to see a list of other data sources.
However, for this article, we will make use of the Excel data source.
So, select the Excel workbook and choose the Excel file you want to work with on your computer.
After you have selected the Excel data you want to work with, you will see a navigation window (Navigator), whose purpose is to show you the properties of your data source.
In this article, I used an Excel workbook titled “Population Data,” the workbook has a worksheet property called “totalpopulation,” and this is what we will be working with.

The next thing to do is to check the totalpoulation box, and you will see this on your screen.
Now, that is the data you would be working with.

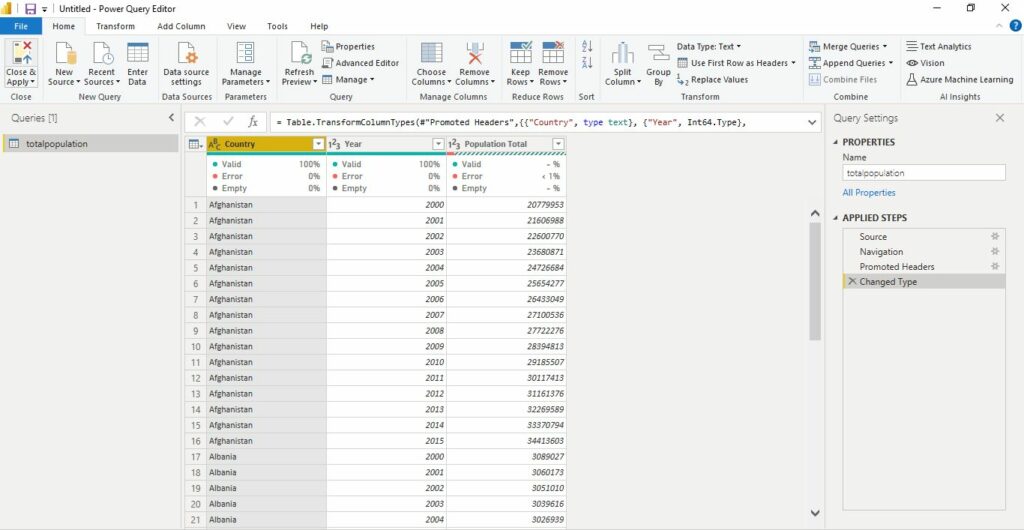
After this, select “Transform Data.” Do not Load the data directly. You must transform the data before doing anything with the data.
This process will redirect you to a separate window called “Power Query Editor.” The purpose of Power Query Editor is to connect to data and prepare data in Power BI before further analysis.
Conclusion: How to Import Data Into Power BI
Now you have learned how to import data into Power BI Desktop and a brief introduction to Power Query Editor (preparing your data).
Subsequently, we will go into understanding the Power Query Editor interface, how it works, and the best ways to transform your data to make it analysis-ready.
Thanks for reading!