If you are looking for a simple and effective way to gather data from clients or employees, then you need Microsoft Forms. This online form builder is easy to use, versatile, and customizable, which makes it the perfect tool for businesses of all sizes.
Whether you are looking to create surveys, feedback forms, quizzes, polls, or registration forms, Microsoft Forms has everything you need to get started.
In this article, I will take you through the 5 simple steps to create your first Microsoft Form. From choosing a template to customizing your questions and sharing them with your audience.
So, grab a coffee, relax, and create your first Microsoft Form in no time!
Step-By-Step Guide to Creating a Professional Microsoft Form
Step 1: Sign in to Microsoft Forms
To create your first Microsoft Form, you will need to sign in to your Microsoft account. If you don’t already have an account, you can create one for free on the Microsoft Forms website and clicking on the “Sign In” button in the top right-hand corner of the page.

Once you sign in, it will take you to the Microsoft Forms dashboard, where you can create a new form or access your existing forms.
Step 2: Create a new form
Now, to create a new form, click on the “New Form” button in the top left-hand corner of the dashboard.
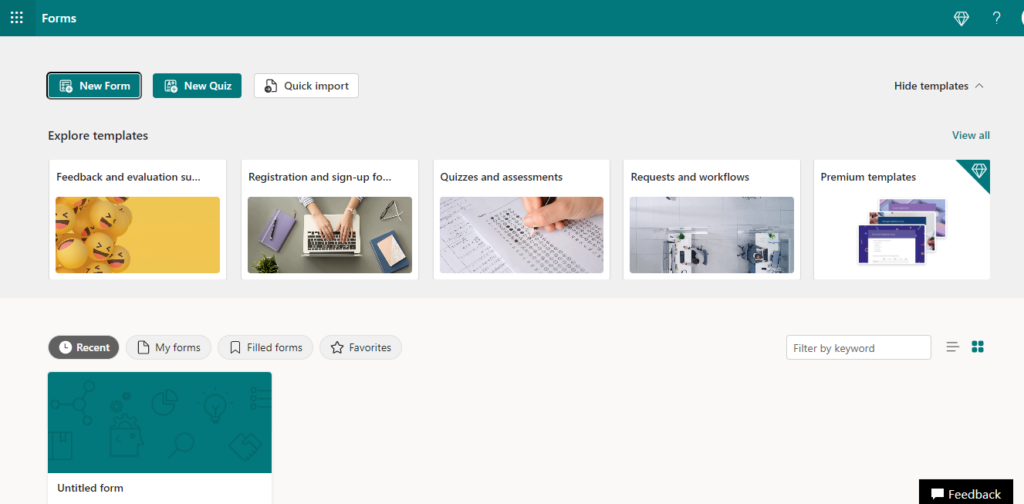
This will prompt you to a blank form to create your form from scratch. Also, you can choose a template to create your form. If you are not sure which template to choose, don’t worry – you can always change it later.
Step 3: Add questions to the form
Once you create your new form, you can now start to add questions. To do this, simply click on the “Add new” button.

Types of questions
- Multiple-choice: allows respondents to choose from a list of predefined options
- Rating: allows respondents to rate a product or service, on a scale of 1 to 5
- Text: allows respondents to provide a short answer to a question
- Long text: allows respondents to provide a longer answer to a question
- Dropdown: allows respondents to choose from a list of options in a dropdown menu
- Date: allows respondents to select a date from a calendar
Best practices
- Keep questions short and easy to understand
- Use clear and concise language.
- Avoid leading questions
- Use a mix of question types to keep the form engaging
- Use branching and question logic to make the form more interactive
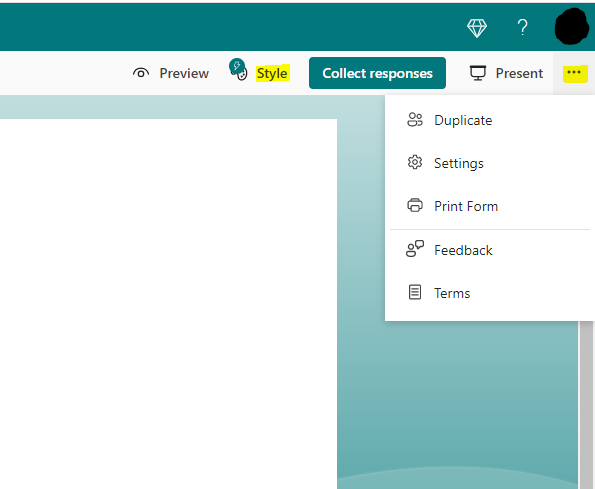
Step 4: Customize the form
When you finally add all your questions, you can then customize your form, such as adding images or videos, changing the form layout and theme, adjusting the form settings, and so on.
To customize your form, simply click on the “Style” button in the top right-hand corner of the form builder, where you can pick a new theme, add background music, etc. Also, you can click on the ellipses to try out some other settings.
Step 5: Share and collect responses
Once you are done with your form, the next thing is to share it with your audience and start collecting responses. To do this, simply click on the “Collect responses” button.

Here, you can share as email, embed codes, on social media, or copy the link to share with your audience. Now, you can start collecting responses, which you can view by clicking on the “Responses” tab in the form builder.

Tips for Creating Effective Microsoft Forms
Now that you have learned how to create your first Microsoft Form, it is important to consider a few tips for creating effective forms.
To start with, keep your questions clear and concise. Avoid using technical jargon that your audience may not understand.
Secondly, use different question types to keep your audience engaged. You can mix multiple choice, text, rating, and more.
Also, don’t forget to customize your form to match your brand and style. This will help to build brand recognition and increase engagement.
Finally, be sure to share your form with your audience through multiple channels, such as email, social media, and your website.
Benefits of using Microsoft Forms
Microsoft Forms offers a range of benefits for businesses, which include:
Free and Easy to use
Microsoft Forms is easy to use, even for beginners. It has a user-friendly interface, and you can create a form in minutes. Also, it is free, which makes it a cost-effective solution for businesses and organizations of all sizes.
Customizable
Also, Microsoft Forms offers a range of customization options, which include adding images, logos, themes, and colors. You can as well add branching and question logic to your form, which makes it more interactive and engaging.
Versatile
You can use Microsoft Forms for different purposes, including surveys, quizzes, feedback forms, registration forms, and more. Also, you can use it to collect data from clients, employees, or stakeholders.
Data analysis
Microsoft Forms offers built-in data analysis tools that allow you to interpret and analyze the responses you receive. You can view the responses, and export the data to Excel for analysis.
Seamless integration
Finally, Microsoft Forms integrates seamlessly with other Microsoft tools, including OneNote, Excel, SharePoint, etc. This makes it easy to collect and analyze responses.
FAQs
Is Microsoft Forms free to use?
Yes, Microsoft Forms is free to use for anyone with a Microsoft account.
Can I customize Microsoft Forms?
Yes, you can customize your Microsoft Form. You can change the layout and theme, add images or videos, adjust the form settings, etc.
How do I share my Microsoft Form?
You can share your Microsoft Form with your audience through multiple channels, such as email, social media, and your website.
Can I embed Microsoft Forms on my website?
Yes, you can easily embed Microsoft Forms on your website.
To do that, click the “Collect responses” button, and choose the “Embed” tab to copy the HTML code. Then paste the HTML code into the right section of your website.
Does Microsoft Forms have analytics and reporting features?
Yes, Microsoft Forms provides analytics and reporting features. You can view a summary of the responses, analyze them, export data to Excel or other formats, and create visualizations for insights.
Conclusion
Congratulations!
In only 5 easy steps, you have learned how to create your first Microsoft Forms!
So, whether you are conducting market research, gathering customer feedback, or just want to engage your audience, Microsoft Forms is perfect for you.
So, just sign in, and start creating your Microsoft Form today!
If you enjoyed reading this, you can also read how to create a Microsoft Developer Tools account for free in minutes.
Thanks for reading!