This Power BI project explores how to connect Azure Blob Storage to Power BI Desktop, even without prior experience. Fortunately, the process is straightforward and can be completed in just a few simple steps.
Power BI is a powerful data visualization tool that enables users to connect to various data sources, such as Azure Blob Storage—a cloud-based storage that allows users to store unstructured data such as images, videos, documents, etc.
In this article, I will walk you through how to connect and load data from Azure Blob Storage into Power BI.
In this tutorial, I will show you how to:
- Set up an Azure Blob Storage account
- Create a container and import data to it
- Generate a Shared Access Signature (SAS) token
- Connect Azure Blob Storage to Power BI Desktop
- Load data into Power BI Desktop and start analyzing
Read to learn more.
1. Set up an Azure Blob Storage Account
The first step to connecting Azure Blob Storage to Power BI is to create a free Azure Blob Storage account on the Azure website (if you don’t have one).
From there, you can create a new storage account and configure it to meet your specific needs. Once your account is set up, you are ready to move on to the next step in the process.
This video tutorial can guide you to complete this step.
2. Create a Container in Azure Blob Storage
After setting up your Azure Blob Storage account, the next step is to create a container. You can liken a container to a folder that stores blobs (i.e., files) that you upload to Azure Blob Storage.
To create a container, you can follow these steps:
- Log in to the Azure portal.
- Navigate to your storage account.
- Select the “Containers” option from the menu.
- Click the + Create button to create a new container.
- Give your container a unique name and configure the settings as needed.
3. Upload Data to the Container
Once you create the container, you need to upload data to it. You can upload data to your container in different ways, such as using Azure Storage Explorer, AzCopy, or the Azure portal.
However, in this article, I will use the Azure portal to upload a sample xslx file. To upload the file using the Azure portal, follow these steps:
- Navigate to your container in the Azure portal.
- Click the “Upload” button.
- Select the file you want to upload.
- Click “Upload” to upload the file to your container.
If properly done (with the help of the above video), you should have something like this:
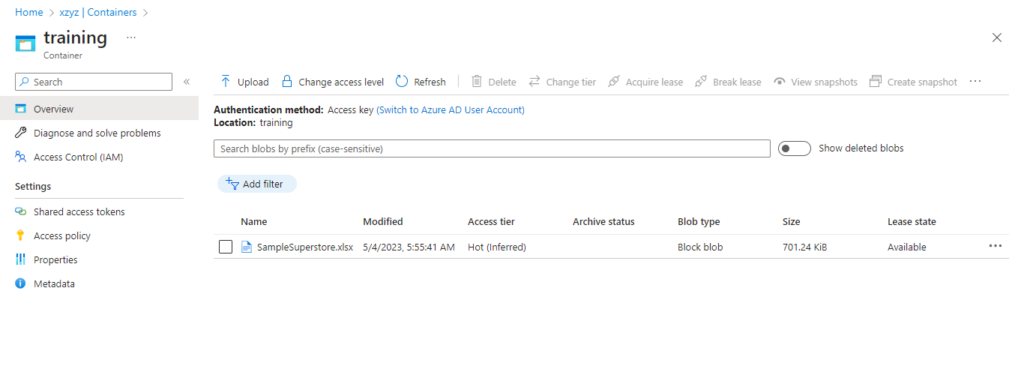
Here are the names of the Azure services/objects I created:
| Azure Service or Object | Name |
| Resource group | azure_training |
| Storage account | xzyz |
| Container | training |
| File | SampleSuperstore.xlsx |
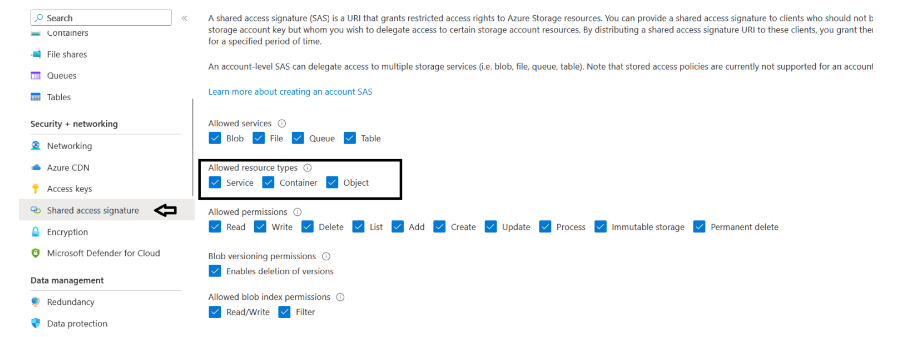
Make the resource types accessible via SAS
To make the resource types accessible via SAS, go to your Azure Storage account page. On the left side of the page, find the Security + Networking section and click on “Share access signature”.
Then, select the checkboxes for Service, Container, and Object. This will allow you to grant access to these resource types via a SAS (Shared Access Signature) token.
Click on the “Generate SAS and connection string” at the bottom of the page:
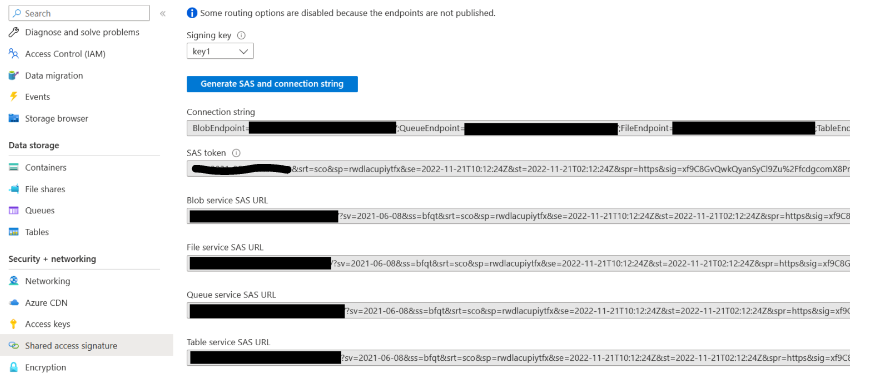
Congratulations! Your Azure account is now ready to use.
Connect Azure Blob Storage to Power BI Desktop
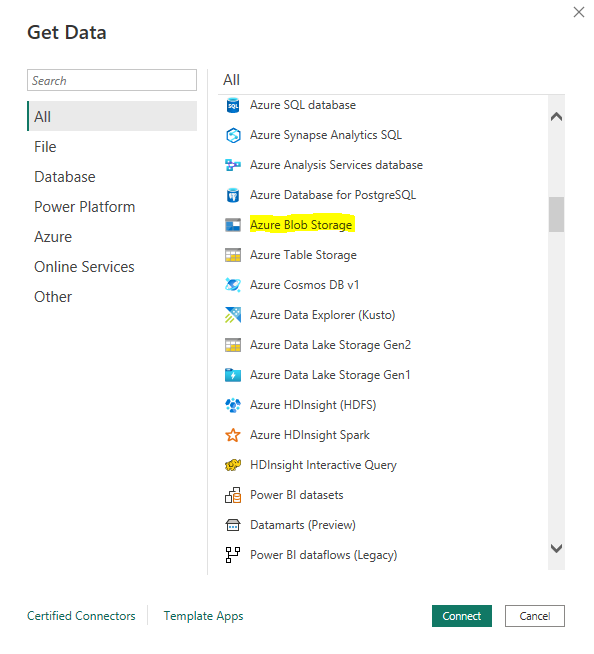
To start with, open Power BI Desktop and click on the “Get Data” button on the Home tab. Next, select “Azure Blob Storage” from the list of available data sources, and click on “Connect”.
In the “Azure Blob Storage” dialog box, you will need to enter the following information: the name of your Azure Blob Storage account.
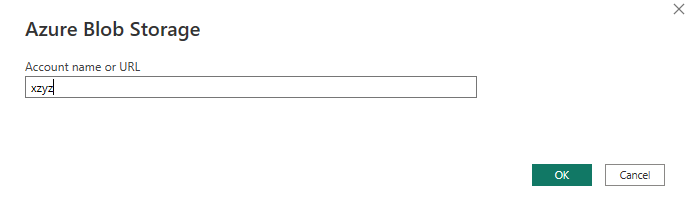
Next, the container name you created earlier, and the access key for your Azure Blob Storage account.
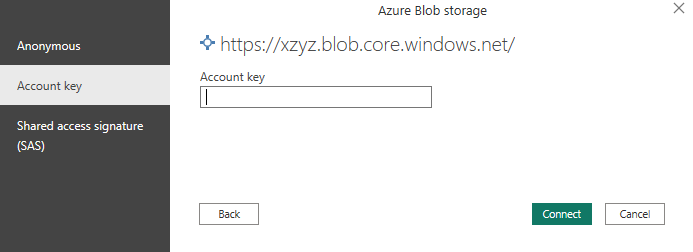
Then click on “OK” to connect to your Azure Blob Storage account.
NB: To connect to Azure Blob Storage in Power BI, you must first create a container and upload data to it using Azure Storage Explorer, AzCopy, or the Azure portal. Thereafter, follow the above steps to connect to your account in Power BI.
FAQs: How to Connect Azure Blob Storage to Power BI Desktop
What is Azure Blob Storage?
Azure Blob Storage is a cloud-based storage solution made by Microsoft Azure that allows users to store unstructured data including images, videos, documents, etc.
Can I connect to multiple Azure Blob Storage accounts in Power BI?
Yes, you can connect to multiple Azure Blob Storage accounts in Power BI. To do that, just repeat the steps outlined in this article for each account you want to connect to.
Can I connect to Azure Blob Storage in Power BI without an access key?
No, you need an access key to connect to your Azure Blob Storage account in Power BI.
Is it possible to load real-time data from Azure Blob Storage into Power BI?
Yes, you can load real-time data from Azure Blob Storage into Power BI by configuring real-time data streaming using Azure Stream Analytics.
How can I troubleshoot Azure Blob Storage to Power BI data loading issues?
To troubleshoot connection issues, check that your access key, container name, and storage account name are entered correctly.
Conclusion
I hope you found this article on how to connect Azure Blob Storage to Power BI Desktop helpful.
In this article, you have learned:
- how to create an Azure account and upload a sample xslx dataset.
- connect Azure Blob Storage to Power BI Desktop
And with the steps explained in this article, you should now easily integrate your Azure Blob Storage data into your Power BI reports and create powerful visuals that can help to make informed business decisions.
Don’t forget, if you ever need a refresher, you can always come back to this article for a quick reminder.
If you enjoyed reading this, you can as well read how to connect Power BI to SQL Server Stored Procedures.
Happy analyzing!