
Are you struggling to import Excel creation dates from SharePoint into your data table? This article will show how to import the creation date of Excel files stored in SharePoint into a data table in Power BI.
By following the steps below, you can easily import the creation date of an Excel file from SharePoint and add it as a new column in your Power BI data table.
Read to learn more.
SharePoint is a platform for storing and managing data and offers seamless integration with Power BI. However, to connect Power BI with SharePoint, you need to have a SharePoint 365 account.
In this article, I will assume that you already set up a SharePoint account.
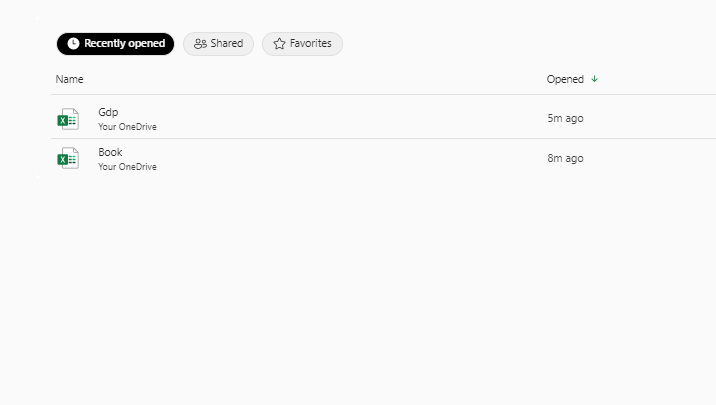
To begin, you must have the Excel file you want to import into Power BI in your SharePoint. The file I want to import into Power BI is titled “Gdp.”
To get started, navigate to the home location of your SharePoint site and copy the HTML site address from your browser. You will use this address later in the process to connect with Power BI.
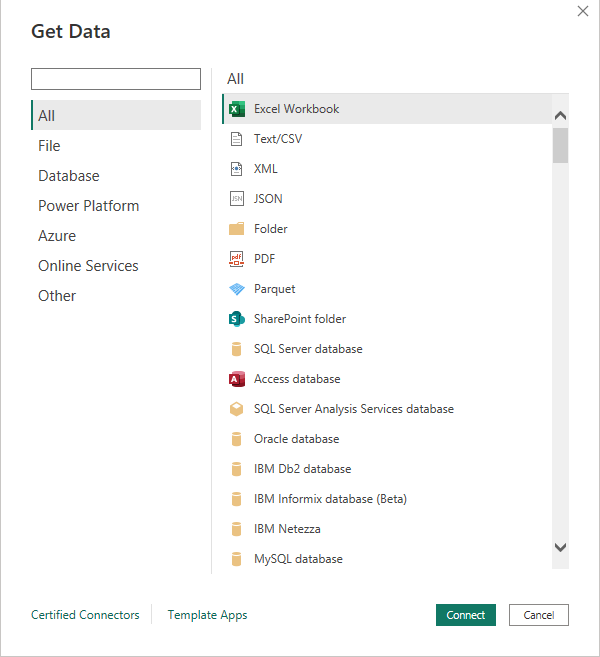
https://example.omicrosoft.com/sites/[Your Site Name]/SitePages/Home.aspxTo import an Excel file, you must first open Power BI and connect to the SharePoint folder containing it.
To do this, select “SharePoint Folder” as the data source by clicking the “Get Data” button on the Home tab. Click “Connect” after entering the URL of your SharePoint site.
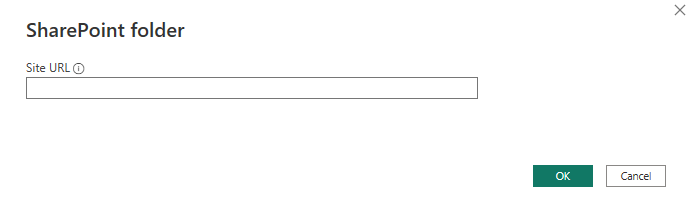
After clicking on “Connect”, you will see a window to enter the SharePoint folder location. In the URL field, you will need to add the SharePoint HTML site address you copied earlier.
This will ensure that Power BI is correctly connected to your SharePoint site and can access the necessary data for your analysis.
Depending on your SharePoint setup, you may need to enter your credentials to log into the SharePoint site. It is also possible to try a few different connection methods until you can properly connect to the SharePoint site.
So, if you encounter any issues during the authentication process, you may want to consult with your SharePoint administrator or IT department for assistance.
Once you enter the HTML site address for your SharePoint site, click “OK” and you will see an authentication screen. Then select the folder that contains the Excel file and click on “Edit” to open the Power Query Editor.
Add a Custom Column for the Creation Date
Once you are in the Power Query Editor, you can add a custom column that will contain the creation date of the Excel file.
To do this, click on the “Add Column” tab and select “Custom Column.” In the dialog box, rename the new column. Then enter the following formula:
= DateTime.LocalNow()This will add a new column with the current date and time. Then click on “OK” to create the new column.
You can also extract the creation date of the Excel file from SharePoint by modifying the above formula and using the “File.Contents” function.
This will extract the metadata of the file and the “DateTime.Local” function will convert the date and time to a readable format.
Here’s an example formula:
= DateTime.Local(File.Contents([File Path])[Creation Time])Replace “[File Path]” with the name of the column that contains the file path and “Creation Time” with the name of the file metadata property that contains the creation date.
You can find the available file metadata properties by clicking on the “Transform Data” button in the Power Query Editor and expanding the “Folder Path” query step.
FAQs
Can you extract metadata from SharePoint using Power Query Editor?
Yes, you can use the “File.Contents” function to extract various file metadata properties such as file size, last modified date, author, and more.
Can you schedule data refresh for Power BI reports that use SharePoint data sources?
Yes, you can schedule data refresh for Power BI reports that use SharePoint data sources. This allows your reports to stay up-to-date with the latest data from SharePoint without manual intervention.
What are some other benefits of using Power BI with SharePoint?
Power BI offers numerous benefits when working with SharePoint data, like visualizing data from multiple SharePoint lists or libraries, creating interactive reports and dashboards, and sharing reports with others in your organization, etc.
How do you troubleshoot errors when importing data from SharePoint into Power BI?
If you encounter errors when importing data from SharePoint into Power BI, you can use the error messages provided by Power Query Editor to troubleshoot the issue.
Also, you can check the data source permissions and ensure that the data is correctly formatted.
Finally, the Power BI community forums can be a helpful resource for finding solutions to common issues.
Conclusion
And there you have it – importing Excel creation date from SharePoint into a data table in Power BI is very easy.
With just a few clicks, as shown in this article, you can add a custom column with the current date and time or extract the creation date from SharePoint.
So, the next time you need to import the Excel creation date from SharePoint into Power BI, do not sweat it – just follow these simple steps and you will get it done in no time!
If you enjoyed reading this article, you can also check how to reference a parameter in a new Power BI query.
Thanks for reading!